Preparation of a Pradoella from the Ordovician of Morocco

- Details
- Kategorie: English articles
- Veröffentlicht: Freitag, 07. September 2018 14:20
- Geschrieben von Paul Freitag
- Zugriffe: 6531
![]() Dieser Artikel ist auch in deutscher Sprache verfügbar. Jetzt zur deutschsprachigen Version wechseln.
Dieser Artikel ist auch in deutscher Sprache verfügbar. Jetzt zur deutschsprachigen Version wechseln.
Morocco is well known for its trilobites, especially those of Devonian origin, delighting with a richness of species and excellent preservation. The Ordovician contains a multitude of trilobites as well. The Fezouata formation for example yields specimen with soft tissue conservation, very large Asaphids and is probably one of the most famous „sites“. The formation furthermore contains concretions shaped like loafs of bread that sometimes enclose complete trilobites. The process of preparing a concretionary embedded Ordovician trilobite will be explained in the following.
A few years ago concretions containing the trilobite Pradoella were much more frequentlly seen on the market compared to now – sadly the offered material was often in bad shape; poorly prepared or severely weathered. Some specimen were assumingly falsifications or partly assembled. Therefore my good friend Colin Teo was especially interested to get an unprepared concretion. Firstly to find out how such a fossil would look like after careful preparation work and on the other hand to see how authentical material is preserved. After searching for a while, he eventually was able to get hold of an unprepared specimen and asked me if I could prepare it. This was shortly after I started to occupy myself with the subject of Ordovician trilobites from Morocco, hence I gladly agreed. It didn´t take long until the geode arrived at my workshop.

Fig. 1: The concretion consists of three pieces, seen from the top – length ca. 17.6 cm.

Fig. 2: From the bottom: Looking closely, you can discern that the concretion is slightly bent in the middle. This results from the trilobites shape. The cross-section is arch-like formed resembling the shape of a reversed boat.

Fig. 3: View of the cross-section of the front half: You can easily see the cross section of the trilobite, located in the centre of the concretion – that’s exactly how preparators want it! The concretion formed concentrically around the fossil. Near its core area it is coloured in light brown to orange, while closer to the surface it is rather grey-brown or coloured like rust and thereby perceivingly darker. On the first glance it already seemed that the darker matrix will be harder, whilst the lighter parts looked more crumbly, which proved to be true during preparation. Hence the Pradoella concretion is structured different compared to usual concretions, which are typically harder and more compact towards the core and softer near to their surface.

Fig. 4: The cross section in detail: the shell is partly thin und seems brittle – it will obviously be necessary to prepare it very carefully!


Fig. 5 and 6: The other half of the concretion splitted into two parts and shows the same characteristic.

Fig. 7: The longitudinal crack along the right part of the conretion shows that the pleurae are well articulated and underlines the observation of a probably softer centre of the concretion. The centre is formed like a lense, surrounded by harder material.

Fig. 8: The pygidium is already visible in the right side of the photo, jutting out of the hard part of the geode. The shell is disrupted here and unfortunately looks like it would rather split from the underside than from the surface that should be revealed. A circumstance which might complicate the preparation of the pygidium later on.

Fig. 9: The left side of the longitudinal breakage.
Looking at the specimen, it´s visible that the pygidium and a big part of the pleurae are present with some certainty. Whether the cranidium and the librigenae are contained as well, cannot be discerned yet. Therefore the preparation should start initially with the head area to check the completeness of the trilobite. Thus I started the preparation beginning with the unbroken half. As the inner part of the concretion seemed to be softer, I started to blast carefully along the cross section.

Fig. 10: After a short while of preparing there were already two pleurae visible. Despite of having a relatively hard shell, they seemed to be very fragile.
At this point I want to discuss the matrix in more detail. Besides the unusual development of a soft centre, the stone exhibits one other peculiar feature: It seems to include some sort of hard, irregular base frame, which is filled with softer sediment. Its structure is comparable with that of a fossil sponge. The needles of a sponge form a stable frame, in whose intermediate space there is softer marl. If you air abrade this sponge, the marl can easily be removed. What remains is the frame of the sponge. It is comparable with the concretion: soft parts of the stone (from few to some cubic millimetres) can easily be sandblasted, whereas the “frame” can only be prepared using an air scriber, as it is partly extremely hard. Through this special condition, working with an air scriber is however aggravated, as it easily “digs holes” into soft spots rather than removing the matrix in splinters as intended. Consequently only a few millimetres can be removed or grinded at a time, to reduce the matrix as fast as possible. The hard area close to the surface could be removed with an air scriber without problems. The proportion of soft matrix was much lower here. The area directly along the shell was luckily predominated by soft matrix, which eased to uncover it. Merely the spots where hard matrix was attached to the shell needed to be revealed with extra care and minimum pressure, to prevent breaking the shell. Because the matrix beneath the shell was soft as well, the trilobites surface doesn´t have the same stability as those of trilobites preserved in massive limestone. The usage of superglue with low viscosity proved to be helpful for hardening parts that were in danger to chip away.

Fig. 11: Following the central axial lobe, I found the cranidium. It fits closely, nurturing the hope that there will be a complete set of librigenae.

Fig. 12: Out of interest, I started to do some preparation work on the pygidium. As feared, it is located in the hard part of the geode and therefore much more difficult to prepare compared with parts in softer matrix.

Fig. 13: However, back to the head area! Within a few hours I uncovered a part of the right side...

Fig. 14: … that should show a free cheek – but where is it?

Fig. 15: Looking at the piece from the side, you can vaguely spot a part of the librigena folded beneath the cranidium on the front right. So at least the right librigena is present! The study of other specimen showed that it is common that the librigenae are collapsed in this way. Typically they are present, but slightly displaced and folded beneath the cranidium.

Fig. 16: Now the left side of the cephalon was the next part of the trilobite to uncover. The glabella and the tip of the ‘nose’ protrude into the hard part of the geode like the pygidium. I decided to uncover these parts later. There are some blemishes, especially were the duplicatures of the shell are located (axial lobes, margin of the cephalon etc.). It is particularly identifiable on the extension of the margin of the front of the cranidium. It seems like there have been cavities, which either collapsed or the top shell is missing, because it was not preserved or was partially damaged before the embedding process. Be that as it may, I intended to reconstruct the missing parts later on to obtain a harmonic overall impression of the specimen in the end.

Fig. 17: View of the left librigena, folded under the cranidium as well - therefore the trilobite is complete! Now it was obvious, that it will be worth to uncover the entire specimen.

Fig. 18: Overview of the intermediate look of all parts of the concretion: The front half is already broadly prepared. Before all parts can be glued together, I decided to uncover the rest of the geode roughly, so it is easier to maintain orientation.

Fig. 19: After removing further matrix, I assembled the concretion by use of coloured glue.

Fig. 20: After the glue dried thoroughly, surplus stone was extensively removed, so I could continue to uncover the retral part of the trilobite. Enlarge view.

Fig. 21: Most of the rough work was done after a few additional hours: the surrounding matrix has been removed and I have levelled the surface of the remaining matrix. In the meantime the trilobite has been mostly uncovered too. Now there was only a bit of precision work left to be done. Adding the finishing touches consisted mainly in uncovering the trilobite from particularly persistent parts of stone, which still clinged to the shell.

Fig. 22: Here it is visible how severely the libringena has been pushed benath the cranidium. The margin lies still deeper in the matrix.

Fig. 23: The pygidium and the lower part of the last pleurae were in the hard part of the stone. I needed to work slowly and sandblast the last millimetre, because there was no interstice between fossil and matrix at all.

Fig. 24: Nearly finished! The matrix has been blasted to achieve a more natural look. Additionally the concentrical layers of the concretion are now visible again. Small parts of persistent stone still need to be removed and the aforementioned blemishes need to be filled. I used coloured epoxy resin for the gluing.

Fig. 25: The right side of the trilobite. The shell of the pleurae is extremely thin and was already partly fragmented in the softer parts of the stone. We decided to leave things as they were, because a reconstruction would have falsified the real condition of the trilobite a bit too much from our point of view.

Fig. 26: The left side looks fairly similar. It does show a gap though, which starts at the cranidium and runs through most of the pleurae of the thorax. Here again we refrained from a reconstruction. Enlarge view.

Fig. 27: The front view shows the immerged librigenae and the eyes. The lenses are not preserved, which is typical for members of the family Calymenidae.
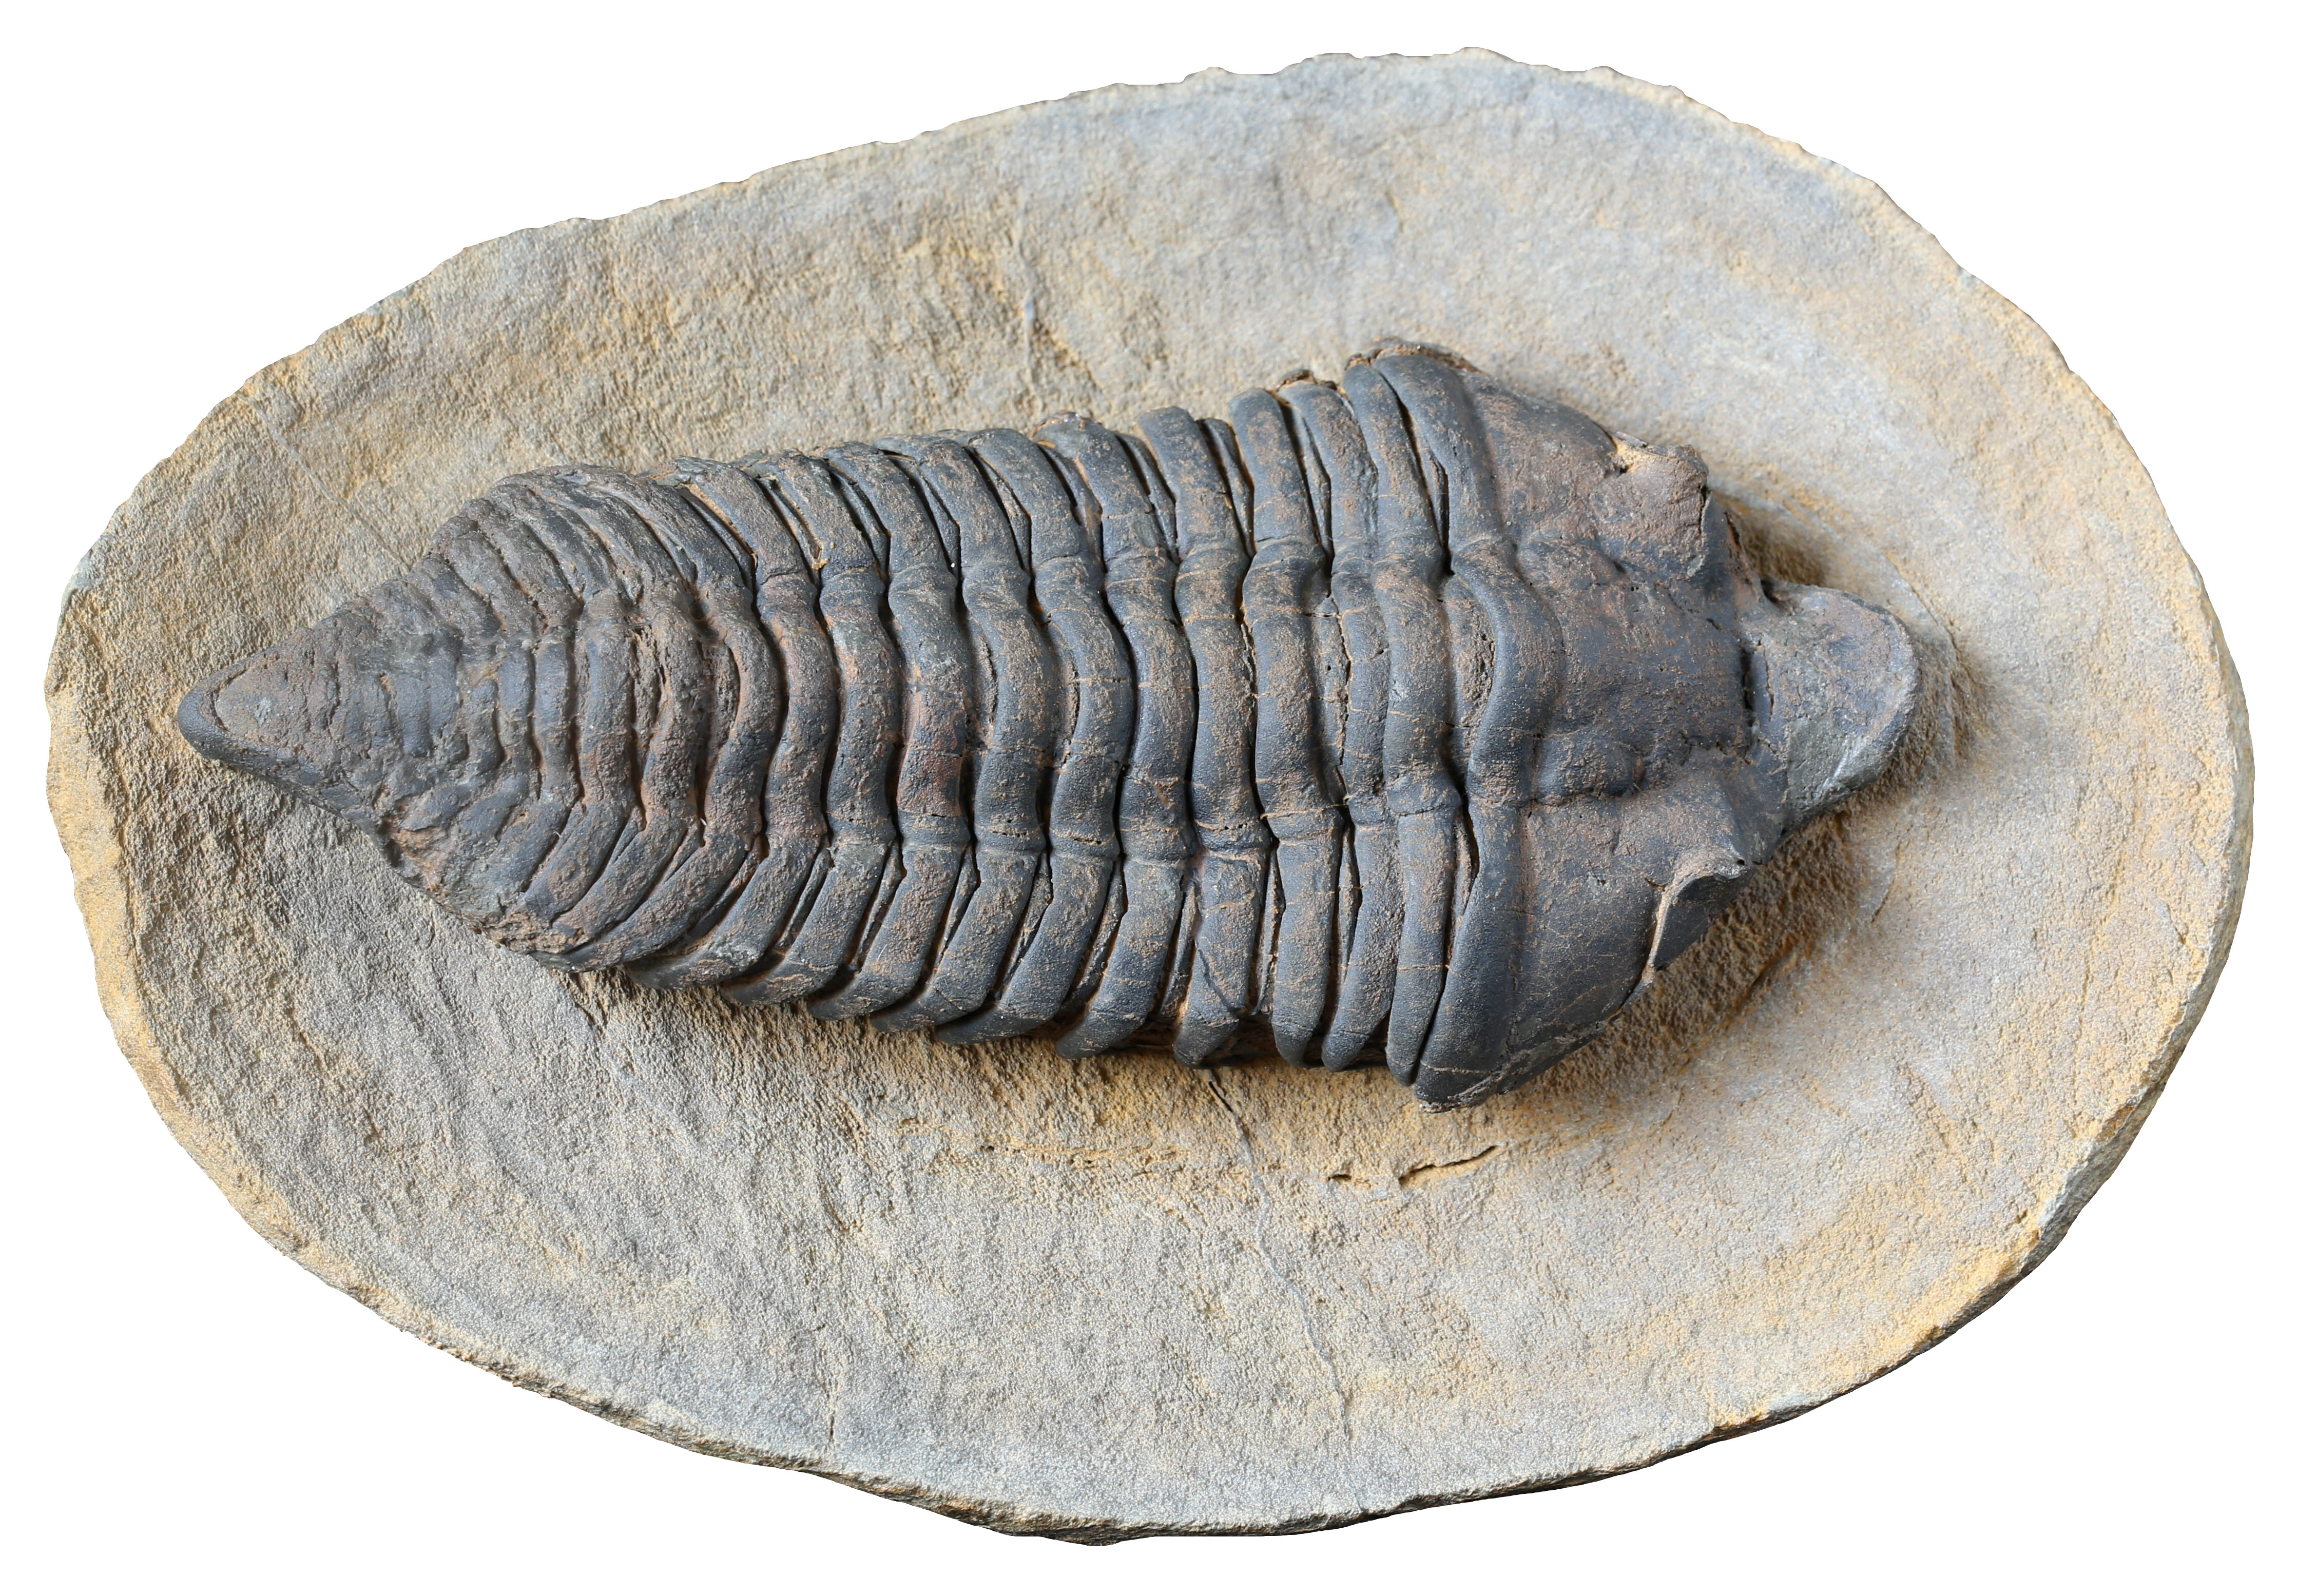
Fig. 28: The finished specimen. Enlarge view.

Fig. 29: From the right. Enlarge view.
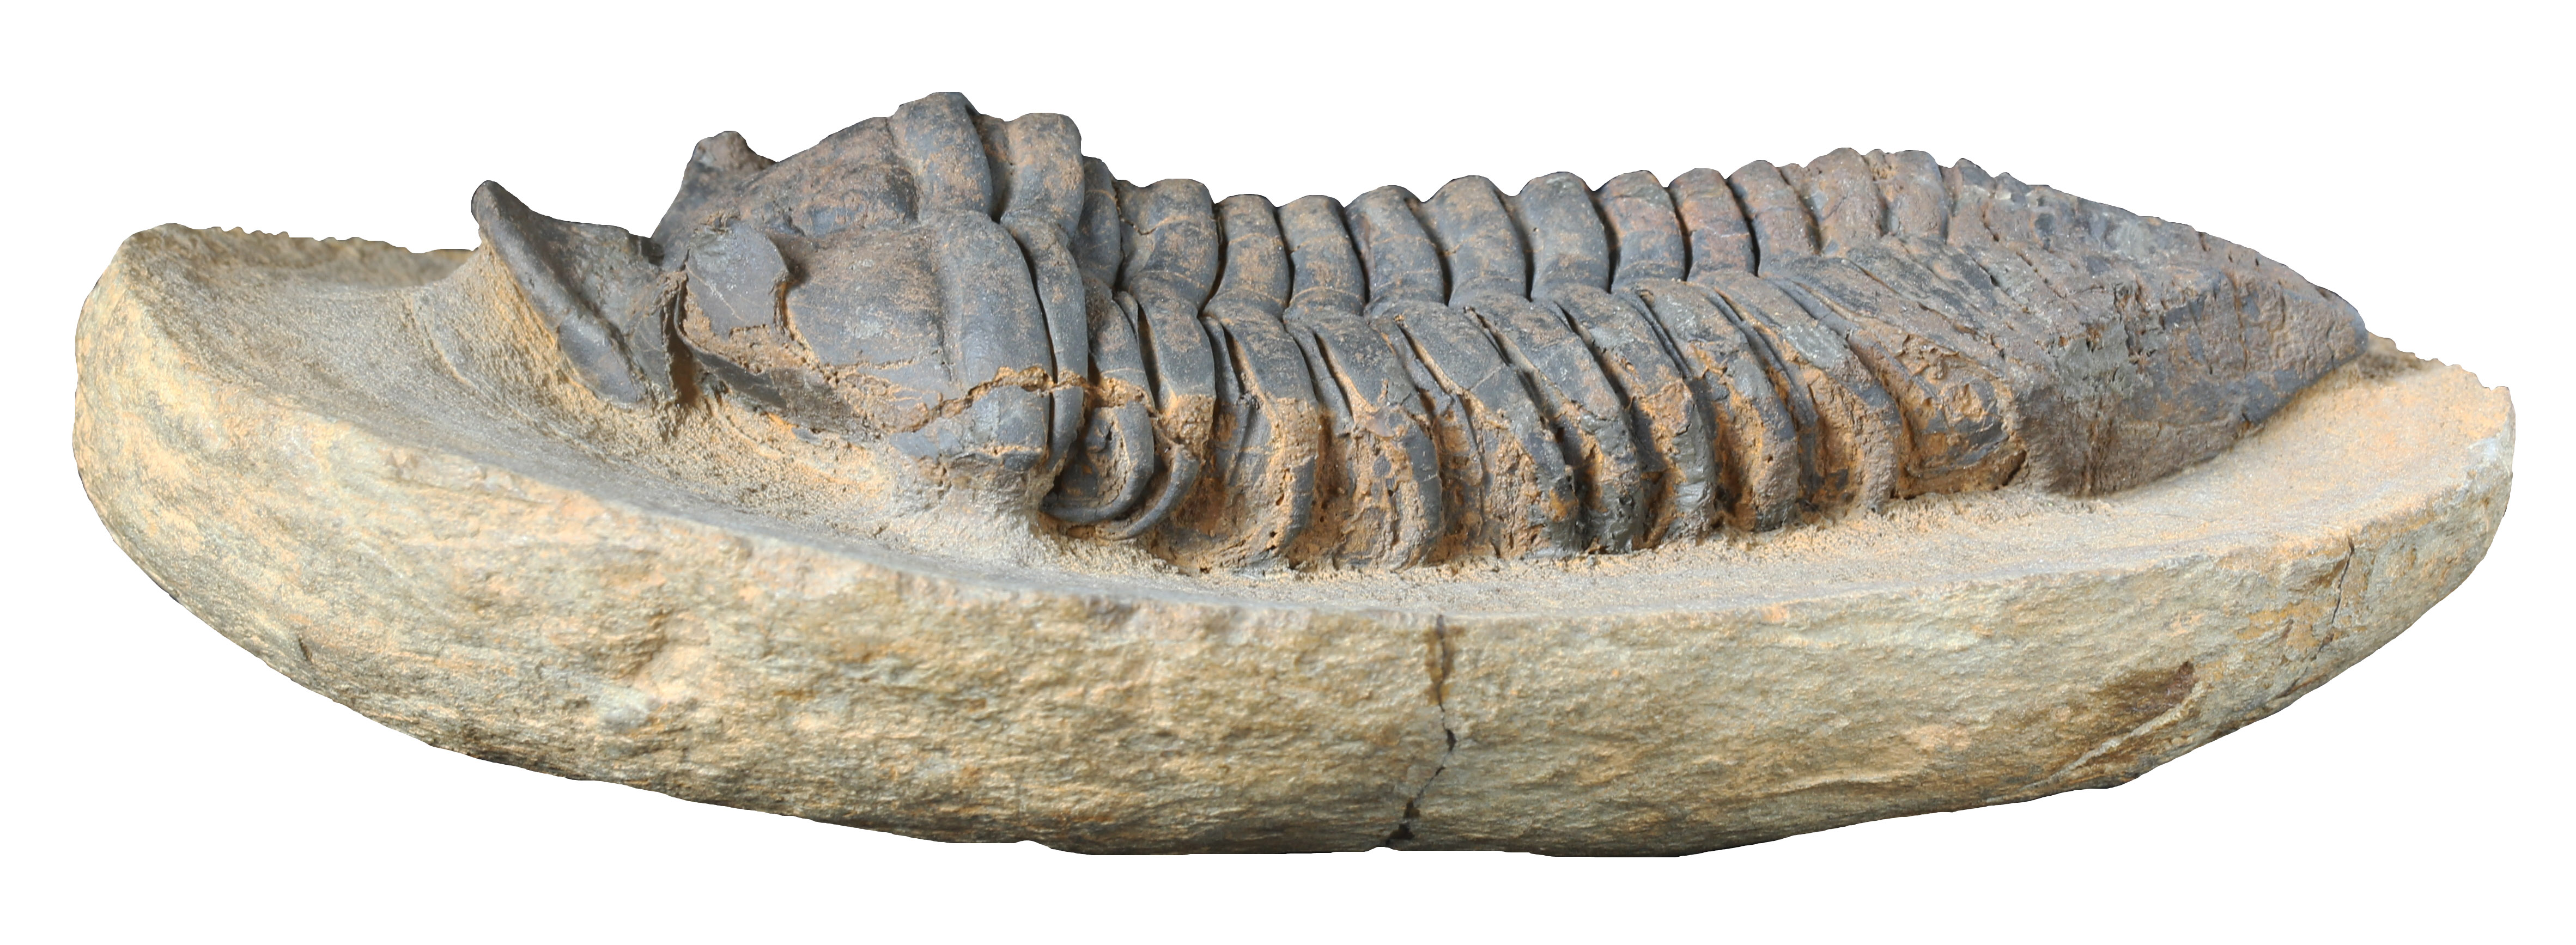
Fig. 30: From the left. Enlarge view.

Fig. 31: Detailed diagonal view of the pygidium.

Fig. 32: Detail of the pygidium.
I want to thank Colin Teo for his trust in me and the opportunity to prepare his interesting trilobite. It was fun and I learned a lot about the difficulties of preparing concretionary Ordovician trilobites.
Fossil:
Pradoella aff. tazzarinensis (VIDAL, 1996) (?) of the lower Ordovician of the Fezouata-Formation, (presumably) Jbel Kissane, Dra Valley
Measurements:
Length of the concretion: 17.6 cm
Width of the concretion: 12 cm
Length of the trilobite: 13.5 cm
Tools and material:
Various air scribes of the HW-range, blasting unit for fine air abrasives, superglue and epoxy resin.
Amount of work:
26 hours
Paul Freitag (Steinkern.de)
Discussion about the article: